Beginning Tutorial - Setting Up Tables
With the Table Wizard you can swiftly design tables by specifying the number of rows and columns of questions. In the examples below, you are shown how to create several types of tables.
Table Design 1:
- Start EZSurvey and open the project named table1.ezf . (Save this file to your desktop first.)
- Select the question where the table will start (in this case, named Q1 ).

- Right-click on the question and select Arrange questions in a table . (Alternatively, click on the table icon on the menu bar.)
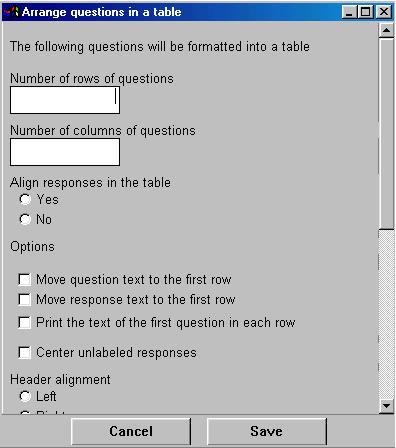
- The Table Wizard will pop up.
- Type the number of rows to arrange your questions in. In this case, it is three (enter number 3).
Note : The total number of questions in the table is equal to the number of rows times the number of columns.
- Type the number of columns you wish to arrange your questions in. In this case, one (enter number 1).
- If you want the cells holding the responses to be aligned horizontally, select 'Yes' for Align responses in the table . This is useful for creating a uniform look to a survey with a number of questions. We will choose 'yes' for this example.
- Select Move Response text to the first row . This will create the table header.
- Click SAVE .
Table Design 2:
- Start EZSurvey and open the project named table2.ezf . (Save this file to your desktop first.)
- Select the question where the table will begin, in this case, the question named Q1 .
3. Right-click on the question and select Arrange questions in a table . (Alternatively, click on the table icon on the menu bar.)
- The Table Wizard will open.
- Type in the number of rows you wish to arrange your questions in. In this case, type in 2.
- Type the number of columns you wish to arrange your questions in. In this case it's 2.
- For Align the responses in the table , select 'Yes'. This will line up the responses in a straight line, useful for creating a uniform look and feel for your survey.
- Select Move Question text to the first row . This will show one question on the header for both Q2 and Q4.
- Select Print the text of the first question on each row. This puts each item, Compaq and Dell, at the beginning of their corresponding rows.
- Select SAVE .
See also...

